Managing a Job to Completion
Step-by-step technician workflow: In route → Check In → Complete job → invoice → photos → Submit Closeout.
Once a job is assigned to you, open it from Jobs in the OpsBack technician app. Follow these steps in order — each button unlocks the next stage. You can also use Directions in Google Maps, call the customer (masked), or add a cash expense receipt at any point before closeout.
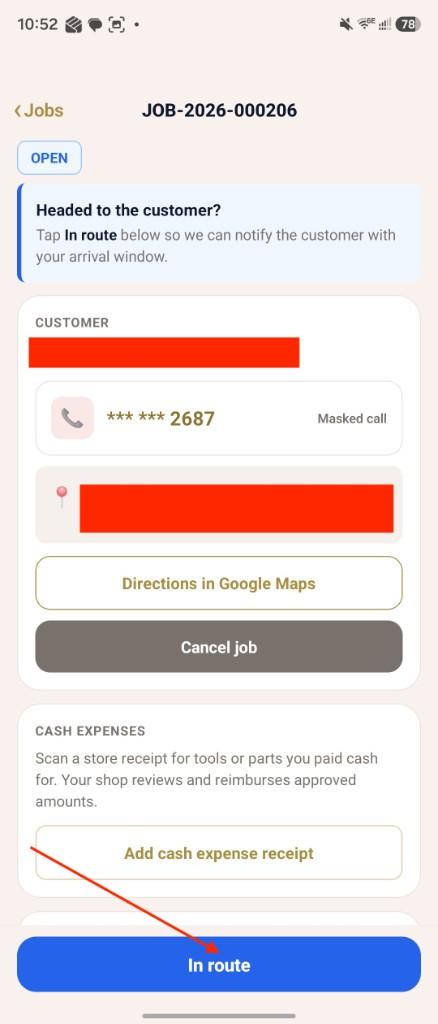
Step 1 — Tap In route
When you are headed to the customer, tap the blue In route button at the bottom of the job screen. This notifies the customer with your arrival window. The job stays OPEN until you check in on site.
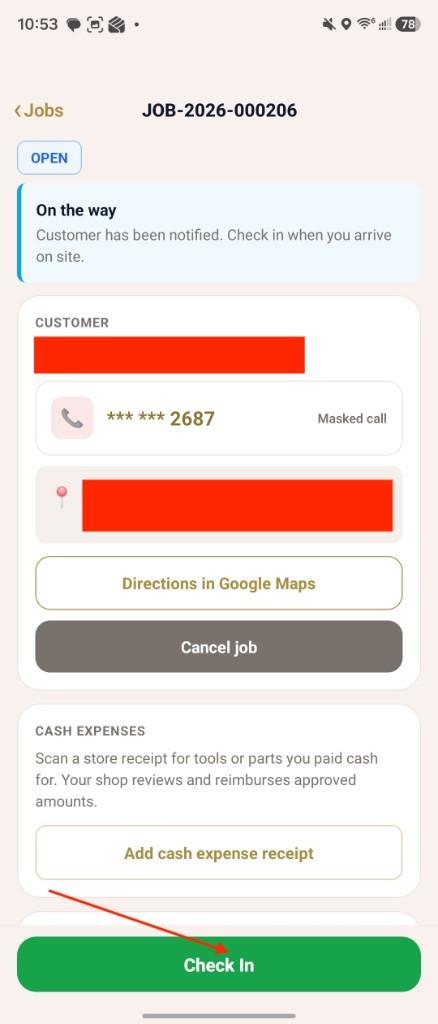
Step 2 — Check In when you arrive
After you tap In route, the status banner shows On the way and the customer is notified. When you arrive at the site, tap the green Check In button. That records your on-site time and moves the job into active work.
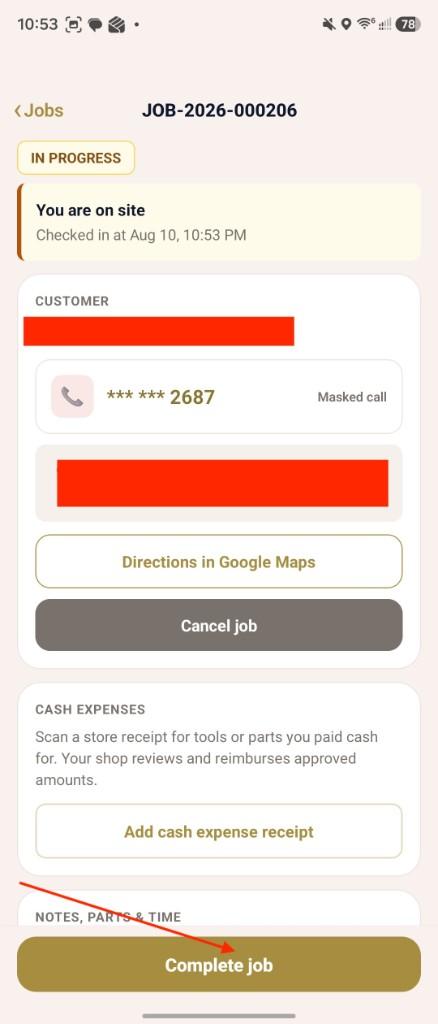
Step 3 — Complete the job when work is done
After check-in, the status becomes IN PROGRESS and the banner shows You are on site with your check-in time. Finish the repair (and add any cash expense receipts if needed). When work is finished, tap the gold Complete job button to open closeout.
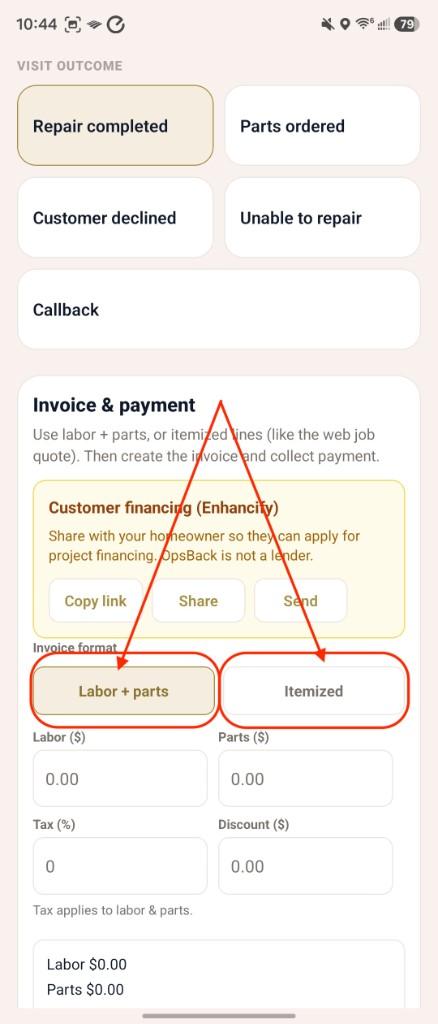
Step 4 — Choose visit outcome and invoice format
On the closeout screen, select the visit outcome (Repair completed, Parts ordered, Customer declined, Unable to repair, or Callback). For Repair completed, choose how to bill: Labor + parts (enter labor and parts totals) or Itemized (add line items like a web quote). Enter tax and any discount. You can also share customer financing (Enhancify) if available.
Step 5 — Create invoice, add photos, Submit Closeout
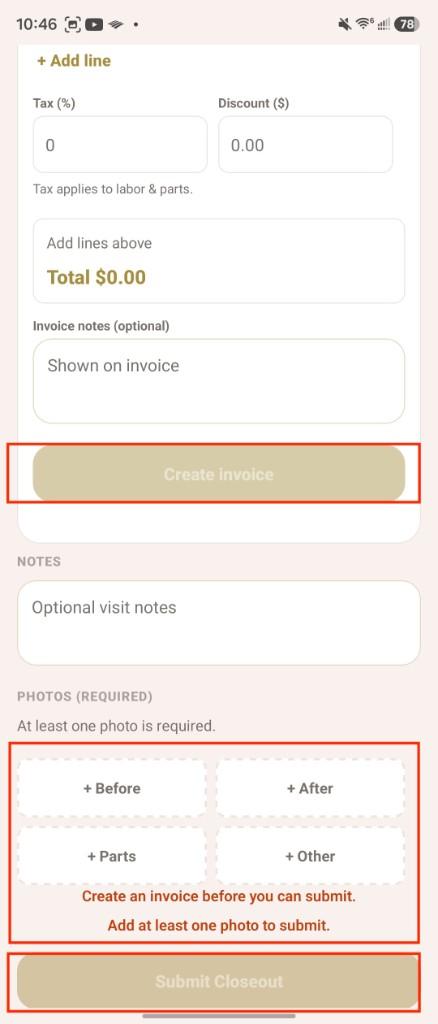
Tap Create invoice after your amounts or line items are entered. Add photos under Before, After, Parts, or Other — you can pick several from your library at once. At least one photo is required. Optional visit notes can go in the Notes field. When the red warnings clear, tap Submit Closeout. The closeout locks after submission so the shop has a permanent record. Owners and dispatchers review those photos later from Jobs → the job → Photos.
Quick checklist
1) In route → 2) Check In on arrival → 3) Complete job when finished → 4) Pick outcome + invoice format → 5) Create invoice → 6) Collect payment or bill Net 30 → 7) Add photo(s) → 8) Submit Closeout. Repair-completed jobs need an invoice. If the total is greater than $0, collect payment or bill Net 30 before submit. At least one photo is required.